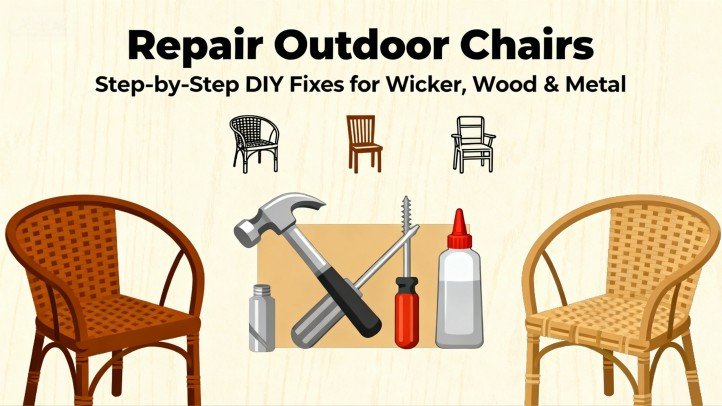
Introduction:
If you searched “how to repair outdoor chair,” you want a clear, low-cost path from “uh-oh” to “back in service.” This guide gives you a diagnose → repair → protect playbook for the most common chair types-wicker/PE rattan, wood, metal, sling/mesh, plastic/resin, and webbing/straps-plus tool lists, cost/time estimates, safety notes, and finishing tips that actually last outdoors. Where it matters, we cite recognized standards and manufacturer tutorials and add Happy Rattan‘s hands-on notes from real repairs.
Safety first: Wear ANSI-rated eye protection whenever cutting, sanding, grinding, or spraying, and follow OSHA PPE guidance for eye & face protection.
OSHA overview: osha.gov
ANSI/ISEA Z87.1 explainer (ISEA): safetyequipment.org
Quick Triage
Use this matrix to jump straight to the right section.
| Material | Common symptoms | Likely causes | Fastest reliable fix | Time | Cost | Difficulty |
|---|---|---|---|---|---|---|
| Wicker / PE rattan | Broken strands, sagging weave, fading | UV, abrasion | Reweave broken runs; gentle heat-set PE; spot recolor + UV clear | 60-120 min | $10-30 | ★★☆ |
| Wood (teak/acacia/eucalyptus) | Surface checks, greyed look, loose joints, peeling finish | Moisture cycling, UV | V-groove + epoxy/filler, sand; exterior oil or varnish system | 2-4 h | $20-60 | ★★☆ |
| Metal (aluminum/steel) | Rust, paint blisters, pitting at welds | Coating failure, galvanic pairing, salt | Hand/power tool clean (SSPC-SP 2/3), anti-corrosive primer + topcoat | 2-5 h | $25-70 | ★★★ |
| Sling/mesh | Torn mesh, sagging seat, frayed edges | UV + load | Replace the sling panel and the spline | 1-3 h | $40-90 | ★★☆ |
| Plastic/resin | Chalky surface, hairline cracks | UV oxidation, impact | Clean/deoxidize; plastic-safe epoxy back-patch; refinish | 1-2 h | $15-35 | ★★☆ |
| Webbing/straps | Loose or broken straps | Creep, UV | Replace straps, re-tension, heat-seal ends | 60-120 min | $20-50 | ★★☆ |
Happy Rattan insight: If a frame weld is cracked through, or a wooden joint is soft/rotted, do not rely on cosmetic fixes-retire or professionally repair. Load paths must be structurally sound.
[More: Outdoor Furniture Maintenance-Complete Checklist]
Tools & Materials
Starter kit: screwdrivers/hex keys, rubber mallet, clamps, utility knife, sanding blocks (80/120/220), small brush & roller, rags, nitrile gloves, ANSI Z87.1 safety glasses. Speed upgrades: cordless driver, oscillating multitool, rivet gun, heat gun, palm/DA sander. Consumables: exterior wood filler or marine epoxy, penetrating oil or exterior varnish/urethane, anti-corrosive or zinc-rich primer + outdoor enamel, PE rattan strands, sling fabric + spline/rails, vinyl/PET webbing + fasteners, stainless hardware, plastic epoxy, color restorer. Happy Rattan insight (coastal/pool areas): Isolate dissimilar metals (stainless, aluminum, galvanized, brass) with nylon washers to reduce galvanic corrosion around fasteners. Great primer here: American Galvanizers Association-Dissimilar Metals in Contact.
How to Repair an Outdoor Chair
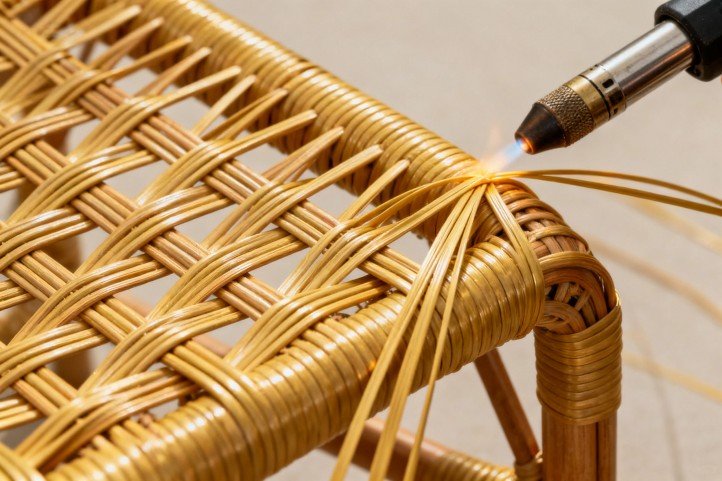
Wicker / PE Rattan: Reweave & Recolor
Prep Vacuum dust. Photograph the weave as a reference. Pre-soak replacement PE rattan strands briefly in warm water for flexibility. Steps
- Remove broken strands and tidy the ends.
- Reweave following the original pattern; maintain consistent tension.
- Gently heat-set the PE (low heat gun) to lock form-avoid scorching.
- Color-match with compatible dye/toner; finish with a UV-resistant clear.
- Deflection check: A slight 5-10 mm “give” at the seat center under load is normal; retension if hammock-like sag persists.
Happy Rattan insight: When only the seat center sags, weave a hidden secondary support strand below the visible pattern-this stiffens the span without redoing the perimeter.

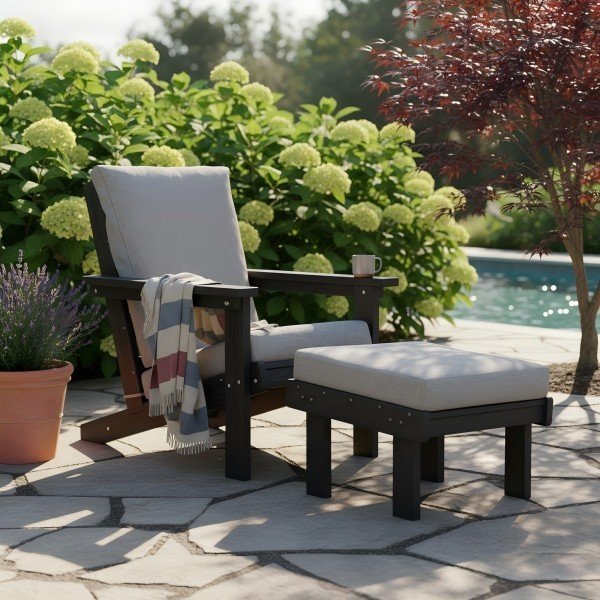
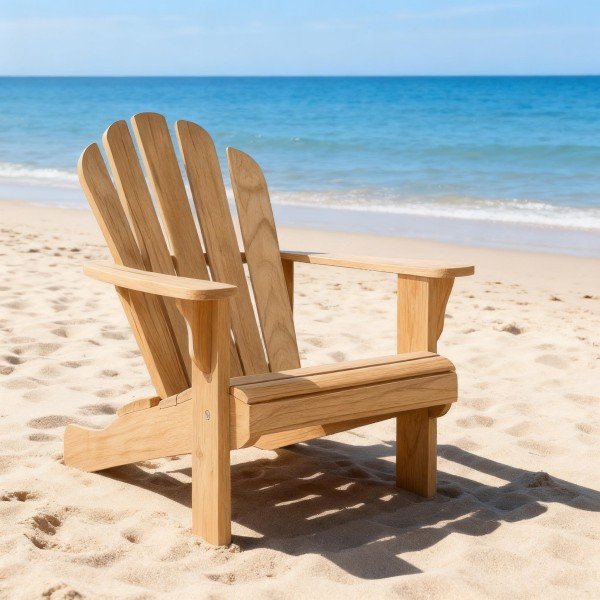
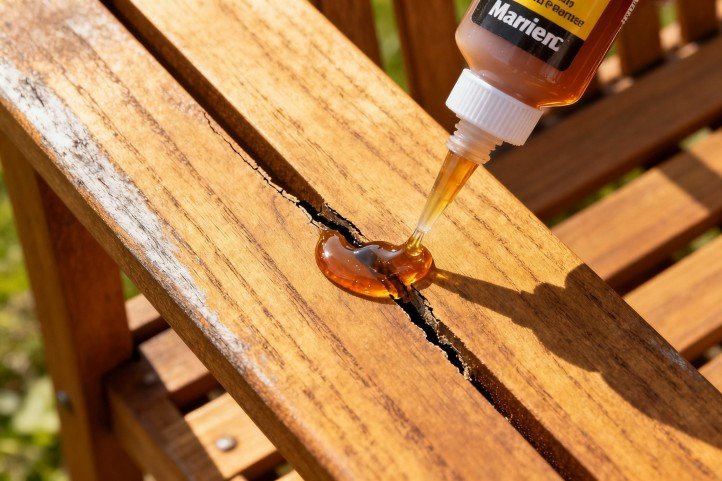
Wood: Crack Repair & Refinish
Repair or replace? Surface checks and finish failure are repairable. Through-cracks at load points or structural rot call for part replacement. Steps
- Clean & dry thoroughly (if the wood is damp, allow 24-48 h to dry).
- V-groove cracks with a knife/multitool; blow out dust.
- Fill with marine epoxy or exterior wood filler; overfill slightly.
- Sand flush (120 → 220 grit).
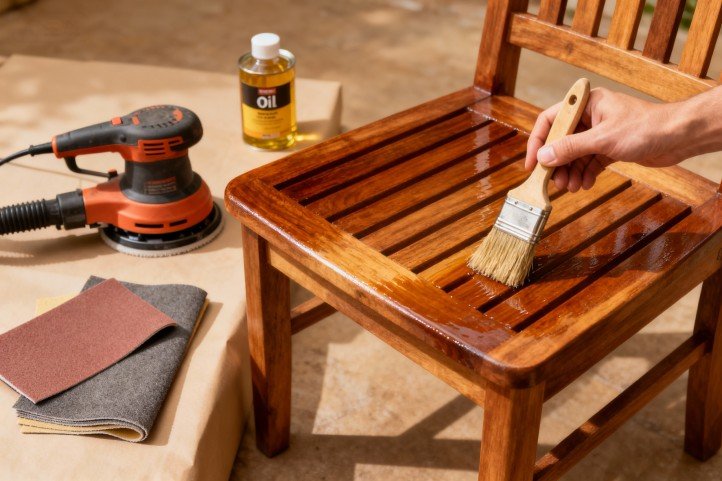
- Finish system:
- Penetrating oil (natural look, easy to refresh), or
- Film-forming varnish/urethane (richer look, longer between coats, but higher prep, potential peeling if moisture is trapped).
Authoritative, practical reading on exterior wood finishing and moisture dynamics:
- USDA Forest Products Laboratory-Finishing Wood Exteriors: Selection, Application, and Maintenance (PDF): fpl.fs.usda.gov
- FPL-Finishing Wood (GTR-282, Ch 16) (PDF): fpl.fs.usda.gov
- FPL-Wood Handbook portal: research.fs.usda.gov
Happy Rattan insight: Teak that turned silver-grey isn’t “ruined”-it’s surface lignin photo-degradation. A two-step oxalic-acid brightener → rinse before oiling restores color with less sanding.
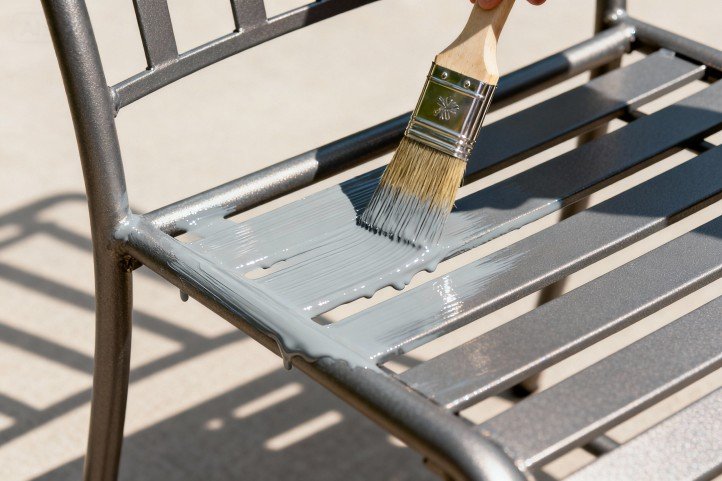
Metal: De-Rust & Repaint
Assess first: Surface rust or paint blisters are DIY friendly. Perforation, deep pitting at welds, or frame sway = scrap or pro repair. Realistic surface prep: For small frames, industry standards recognize hand/power-tool cleaning:
- SSPC-SP 2 (Hand Tool Cleaning)-remove loose rust/paint; adherent coating that can’t be lifted with a dull putty knife may remain.
- SSPC-SP 3 (Power Tool Cleaning)-same goal using grinders, needle scalers, etc. AMPP standard summary: content.ampp.org
- AGA overview of SSPC preps: galvanizeit.org
Steps
- Wash/degrease, rinse, dry.
- De-rust: SP-2 or SP-3 until only sound coating remains; feather edges.
- Prime: anti-corrosive or zinc-rich primer compatible with the substrate (use aluminum-rated primers on Al).
- Topcoat: exterior enamel or 2K; respect recoat and curing windows.
- Isolate dissimilar metals (nylon/butyl washers) around stainless fasteners in steel frames to curb galvanic attack.
Happy Rattan insight: Two thin coats beat one heavy coat. Most DIY failures come from poor prep and missed recoat windows.
Sling / Mesh: Replace the Panel
When the mesh tears or sags, replacement is the correct fix. It’s a solid beginner project. Authoritative how-tos
- Phifer (manufacturer) step-by-step guide: phifer.com
- OnlineFabricStore tutorial (text): onlinefabricstore.com
- YouTube walk-throughs:
- OnlineFabricStore-How to Replace Outdoor Sling Chair Fabric with Phifertex:
- Sailrite-Sling Chair Cover Replacement (Pocket/Envelope Style):
- OnlineFabricStore-How to Replace Outdoor Sling Chair Fabric with Phifertex:
Steps
- Remove end caps; loosen split rails; slide out old panel.
- Measure old panel (length/width + seam allowance) or measure between rails; cut new mesh.
- Insert the spline, feed panel into rails, reassemble, and tension evenly (mark centerlines to avoid twist).
- Trim excess and reinstall caps.
Happy Rattan insight: Use heavier mesh (e.g., Phifertex Plus) for seats and lighter mesh for backs to balance support and comfort.
Plastic / Resin: De-Chalk, Back-Patch, Refresh
Steps
- Wash with mild detergent; rinse/dry.
- De-oxidize (fine abrasive pad or plastic restorer) until chalking stops.
- Back-patch cracks with plastic-safe epoxy plus a thin backing tab; clamp till cured.
- Sand & refinish with a plastic-compatible coating or rejuvenator.
Happy Rattan insight: Hairline cracks often start at tight screw holes. Slightly enlarge holes and add rubber grommets to diffuse stress and slow future cracking.
Webbing / Straps: Re-Web & Tension
Vinyl/PET straps lose tension with heat and time; replacement is cheap and transformative. Visual guides
- General sling/webbing content hub (Phifer): phifer.com
Steps
- Measure center-to-center; cut straps 8-12% shorter than span (varies by wrap and material).
- Warm straps (hot water/heat gun) for elasticity.
- Fasten one side, stretch across, fasten the other; keep lines straight.
- Heat-seal ends to prevent fraying.
Happy Rattan insight: Mix two strap widths (e.g., 1.5″ + 2″) in the center zone-comfort improves, and the pattern hides mid-span compression over time.
Cost × Time × Difficulty
| Repair | DIY time (per chair) | Typical materials | Est. cost | Skill |
|---|---|---|---|---|
| Reweave PE rattan (seat patch) | 1-2 h | PE strands, UV clear | $10-30 | ★★☆ |
| Wood crack fill + spot refinish | 2-4 h | Epoxy/filler, oil/varnish | $20-60 | ★★☆ |
| Metal de-rust + repaint | 2-5 h | Primer + enamel, abrasives | $25-70 | ★★★ |
| Replace the sling panel | 1-3 h | Sling mesh + spline | $40-90 | ★★☆ |
| Plastic crack back-patch | 1-2 h | Plastic epoxy, restorer | $15-35 | ★★☆ |
| Re-strap webbing | 1-2 h | Vinyl/PET straps, fasteners | $20-50 | ★★☆ |
Nerd note (why “marine-rated” paints last longer): Lab salt-fog tests are often referenced to compare corrosion resistance across coatings-see ASTM B117 scope: store.astm.org. It’s a comparison tool, not a direct predictor of your exact service life.
Protection & Maintenance
Seasonal checklist
| Season | Tasks |
|---|---|
| Spring | Deep clean; tighten fasteners; spot sand & touch-up paint/varnish; re-oil teak if dry. |
| Summer | Rinse salt/pool splash; use breathable covers; flip cushions; check strap tension. |
| Autumn | Clean, dry thoroughly; isolate dissimilar metals if swapping hardware; store cushions. |
| Winter | Cover off the ground; avoid sealed plastic bags that trap moisture; ventilate monthly. |
Happy Rattan insight: A thin maintenance coat before peak UV (late spring) outlasts a heavy rescue coat at season’s end-prevention beats repair.
[More: Outdoor Cushion & Fabric Care-Stain, UV & Mildew Basics]
Safety, Standards & When to Walk Away
- PPE: Follow OSHA guidance and choose eyewear meeting ANSI/ISEA Z87.1-2020 (ISEA explainer: safetyequipment.org).
- Metal prep expectations: DIY scale often uses SSPC-SP 2/3 (hand/power tool cleaning) rather than blasting. AMPP SP-2 summary: content.ampp.org and AGA’s overview: galvanizeit.org.
- Galvanic caution: Don’t pair stainless fasteners with bare carbon steel without isolators; read AGA’s primer: galvanizeit.org.
- Stop-use triggers: cracked welds, through-rot at wood joints, perforated tubes, or visible frame deformation under seated load.
Conclusion
To learn how to repair an outdoor chair the smart way, run this loop: diagnose the material & failure, repair with a method suited to outdoor exposure, then protect with finishes and seasonal care. Start with soft parts (sling/webbing) for the biggest comfort jump; then tackle frames (wood crack fill + refinish, metal de-rust + repaint). With correct prep and a pre-season maintenance coat, your chairs will serve seasons longer. Spend less time shopping, more time sitting.
FAQ
Q1: What’s the cheapest way to repair an outdoor chair?
A: Replace the soft parts first- the sling fabric or vinyl straps. It’s a 1-3 hour DIY with basic tools and delivers the biggest comfort upgrade per dollar. See the manufacturer’s tutorial: Phifer sling replacement guide.
Q2: Can I repaint a rusty metal patio chair without sanding to bare metal?
A: Yes, remove loose rust/paint with hand or power tools (SSPC-SP 2/3), feather edges, apply an anti-corrosion primer, then topcoat. Skipping prep causes early failure. Standard summary: AMPP SP-2.
Q3: How do I replace sling fabric on a patio chair?
A: Measure the old panel, cut new sling mesh (add seam allowance), insert spline, slide into rails, reassemble, and tension evenly (mark centerlines)—walk-throughs: Phifer guide, OFS text tutorial.
Q4: How do I fix broken patio chair straps (webbing)?
A: Cut new straps shorter than the span (typically 8-12% short), warm to add stretch, fasten one end, tension across, fasten the other, and heat-seal ends.
Q5: Is teak oil or varnish better for outdoor wooden chairs?
A: Oil: natural look, easy to refresh, needs more frequent maintenance. Varnish/urethane: richer look, longer intervals, but demands thorough prep and can peel if moisture is trapped. See FPL’s finishing guidance: Finishing Wood Exteriors.
Happy Rattan tip: For sling and webbing jobs, mark midlines on rails/panels/straps. Symmetrical tensioning prevents the dreaded “corkscrew” seat.